DIY Hockey is a place for this beginner to collect information and ideas from all over the internet into one place. This is stuff I use as I work and play to get better, and hopefully you'll find something useful for yourself here too.
1. The ability to move quickly and easily.
2. The ability to think and understand quickly.
So there's physical agility and mental agility. We're going to talk about the physical side here.
There are lots of agility drills out on the internet. The "Five Spot" (AKA Five Dot) drill is one that I've seen used by hockey coaches and players. To do the drills, you'll need to lay out the following pattern.
You can buy mats or carpets with the dots already there, or you can use chalk outside, or even bits of tape indoors. The diagram below shows the standard layout, but for younger, smaller players, you can shrink it to fit their size (slightly wider than shoulder width). Ideally, the spots should be four or five inches across.
So how do you use this pattern?
This .pdf page lays out the drills and time goals for the drills. Clicking that link will open a file you can download for reference.
Here's an excellent video showing each exercise in action.
The Fast Hands Stickhandling Training Aid is very cool and allows a lot of creativity and variety as you practice. In the video below, Mark Ivan shows how you can build your own version using 3/4" PVC. His instructions are clear and simple, and you'll see step by step how to proceed.
I sat in my living room with a PVC cutter and parts, and created my own (just slip fit for now) in about a half hour. Time well spent.
Mark gives all dimensions in the video, but here it is all listed out. All the pieces are 3/4" PVC.
1 - 12" long
2 - 11" long
2 - 10" long
6 - 3 1/2" long
4 - 1" long
Primer and solvent (optional)
Spray paint (optional)
A note about the primer and solvent, you'll find that you don't need much, so buying a can of each will give you enough for many, many projects.
Here's a great video showing you twenty five different drills you can do with your new training aid, and each drill is shown at full speed, then slowed down so you can see what's going on. One thing to remember is that you don't have to stand still in front of it. Try standing to one side or the other as you practice. Move around it as you move the puck. You can also pop the puck or ball over the top of the bar, so you can get used to thinking in 3D as you stickhandle.
Each flat side is numbered, with 1 on the left, going to 5 on the right. This becomes helpful when you write down your favorite drills, so you can note which openings you're using. I can see this becoming a kind of "HORSE" game with stickhandling sequences instead of shooting too. Think Simon with a puck instead of flashing lights.
Finally, here's a video with stickhandling wiz Pavel Barber. He stresses creativity and getting out of your comfort zone as you practice for maximum benefit. The key here is not trying to go too fast for your skill level. Speed will come as you improve, so don't frustrate yourself needlessly by trying to do too much too soon.
I built the one described in the video, and as he suggests in the video comments, I made mine three feet long instead of four. Honestly, this takes about twenty minutes to build, start to finish.
This works great.
Details: I used a 3 foot long length of particle board and a 40" long bungee strap.
I used the fat, wide bungees he mentions in the first comment on the video, but they're now unavailable. So for my next one (to be built), I bought these "Highland Fat Strap Bungee Cords 4-Pack - 30" and 40" from Amazon.
They're made by the same company. Prime shipping, and only $7.99 for the set. I do plan on making another one soon.
If you're worried about the bolts chewing up your floor or carpet, you can get non-slip material and put pieces under the legs. The plastic dip for tool handles might work too.
Here are some videos I found on YouTube showing different techniques and drills for stickhandling. I re-watch these occasionally as a refresher, and to remind myself to focus, because I will get better if I put in the work.
I'll be adding to this set over time, so check back and scroll down to see what's new.
Remember the commercially available stickhandling training aids I talked about before? Well, here's the first set of instructions on how to make your own. I'm going to use 3/4" PVC pipe for mine, but there are numerous YouTube videos out there showing you how to make versions out of wood, broken hockey sticks, old pucks, and more. In fact, my first set (that I still use) are made of scrap wood and a dowel bought at Wally World or any craft store. I describe it in detail, and how to build one in another post here on DIY Hockey.
If you only have 90 degree elbows laying around, you can make a usable version, as shown in this picture. It's kind of easy to tip over though because of the design of the legs. It's simple to improve on it.
First, replace the bottom 90 degree elbow with a "T" joint, and by adding short legs on each side the stability is much better. Here's a photo of one of the "T" legs, painted but not attached.
The picture is rotated, sorry about that. The short white piece at the top is a 1" long piece of PVC pipe, and the two side legs are 3" long pieces of the same. I've found that by using the 1" length connector between the "T" and the 90 degree elbow above, you have enough room for a stickhandling ball to pass beneath. Perfect.
One bonus is that by making several of the "T" foot sections, I could configure this pretty much any way I could imagine. Add a "T" joint to the end of the crossbar, and you can add another straight piece, like so.
You can also vary the length of the top bar to change the difficulty of drills with the dangler. Watch the video below to see what I mean.
Instead of a "T" joint, you could add 45 or 90 degree elbows to create a V or U shaped dangler.
You can use PVC adhesive to permanently fix the feet and just press fit everything else together, or you could treat everything like one giant tinkertoy set and build to suit. It takes seconds, and is light enough that a small bag could carry a lot of pieces to use.
I still recommend the cheap spray paint though. Because spray paint. I went to WalMart this morning and looked through their paint section. They were out of the red, so I got two cans of flat black for less than a dollar each. Here's what my PVC danglers look like after a coat of paint, I think they look pretty good.
Here's a video showing some nice drills you can do with a "dangler" stickhandling aid.
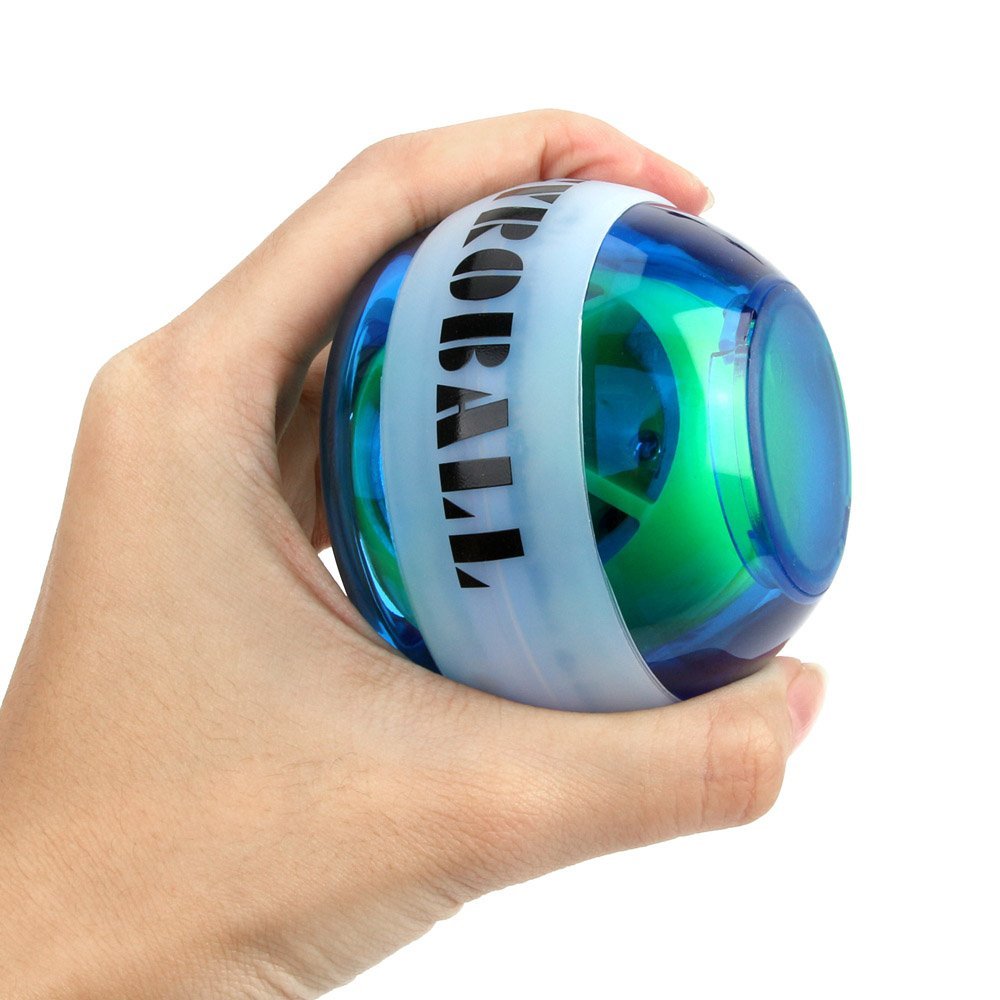
I'm not sure whether this qualifies as a toy or a genuine piece of exercise equipment. I bought this Power Ball Gyro Exerciser on Amazon for less than $15.00.
The idea is simple, inside the hard plastic outer shell is a gyroscope (the yellow ball with the groove in the picture). You get the gyroscope spinning, and then hold on to the outer shell. They gyro creates momentum that tries to force the ball into motion, and as you hold the ball, your grip resists that force. This works your small muscles.
It does seem to work, at least as far as tiring out your muscles. Getting the gyro revved up and then holding the ball still takes some effort. When I'm done with a "workout" I can definitely feel it.
I bought a stripped down model. You can get some that light up and have an LED screen mounted to tell you the RPMs that the gyro is doing. The way mine works is that you tuck a string (included) into the slot on the gyro, and pull start it like a lawnmower. Once you get it spinning, you start to make a rocking motion with your hand to rev the gyro up even more. Once it's going good - and you can tell - then you can just hold the ball and fight the centrifugal forces. I find that I'm much better at keeping it going, and revving it faster, with my dominant hand (right, in my case).
This thing isn't benignly harmless, you have to pay attention while using it. There's some heft to it and the entire unit is trying to move when you've got it going. In addition, I was inattentive once and managed to touch my forearm skin to the spinning gyro (clumsy and not paying attention... it's a gift I have). It pinched off a thin layer of my skin about a half inch long and eighth of an inch wide. Left a visible scar when it healed.
This thing is fun and kind of cool to play with, and it might actually be beneficial when it comes to building up your strength, but it doesn't do anything that you can't do with other exercises. There's a lot of hype on the internet about powerballs, and unsurprisingly, some of the most glowing reviews come from sites that sell them.
As I usually try to do, here's a video showing the powerball in use. Note that he starts the gyro with his thumb and rocking his hand. I've not been able to do that, but the string works just fine for me.
If you give it a try, or have used it before, let me know in the comments. Did it work for you?
This video has more excellent, simple exercises to improve the strength in your hands, wrists and forearms. Doing these will definitely help your game.
If you don't have an appropriate weight to use, try something like a soup can (for the little ones) or even a heavy book. It shouldn't be so heavy that it's awkward.
Like most beginners, there's a huge difference in how well I can stickhandle depending on where the puck is. I do ok as long as the puck is in front of me, or on my forehand. Even if the puck is slightly behind me on my forehand side, I'm not completely hopeless.
My backhand is a whole different story. I stink. This is ok, because it points out exactly where I need to devote extra time and attention in order to improve the most.
In the diagram below, the two red ovals indicate where my feet are when I'm in my hockey stance.
With practice, my goal is to be able to stickhandle equally well no matter where the puck is. Not just around, but out wide and in close, down by my feet.
You could, if you wanted, "draw" this diagram on the floor or ground where you practice. Use chalk outside, or electrical tape or masking tape indoors on tile or hardwood floors. I've never seen the need to have this diagram drawn out for me, because I have it in my mind while I'm practicing, but I can see where it would be handy if you're working with someone else (like a younger player).
Here's another excellent video showing what I'm talking about:
The Hockey Wrap Around is a training aid that lets you use your expensive ice hockey stick outside without chewing up the bottom of the blade. Here's a video about it (enjoy some pretty good stickhandling too).
I have the model shown above, and it really works well. It does add some weight (between two and three ounces) to the blade of the stick, which isn't a bad thing. When you take it off before heading out onto the ice, your stick feels lighter and your hands feel faster. It's like training with a weighted stick.
I really like mine, and it has done an excellent job of protecting my stick. I may not have a huge financial investment in my hockey stick (see buying my first hockey stick here), but the cost of the Wrap Around is still well worth it to me. There are videos on YouTube about making a sort of DIY version using aluminum soda cans, but for me, the hassle outweighs the cost savings. This isn't something that's going to wear out in a week.
I suppose giving the bottom of your stick an extra layer or three of tape would work too, at least for a little while. So while I think this is a good thing to have and an excellent value, there are certainly ways to do more or less the same thing for less money.
The people who created the Wrap Around have continually improved it (as seen in the above video), and their latest version is called the Wrap Around Ice. Instead of metal, it's made of a durable plastic. It weighs about half as much as the metal versions.
I haven't tried the Wrap Around Ice yet, because my original metal one still has plenty of life left in it, and I'm not one to rush right out to get the latest toys.
As usual, I'll put a link here to Amazon. The price at the time I posted this is $31.00, with free shipping if you have Prime. You can find it cheaper online at other websites, but you might have to add shipping to the cost.
If you like to practice or play outside, especially with the same stick you use on the ice, then I think the Wrap Around is a solid investment.
One last thing, if you're eyeing those stickhandling aids that were shown in the video, I'll be posting DIY versions of most of them in the near future.
Do you have the Wrap Around? What do you think of it? I'm especially interested to hear your experiences with the Wrap Around Ice. Leave a comment, and thanks for reading.
Your top hand does most of the stick work in hockey. I found that I needed to be stronger, especially since I'm "wrong handed" and use my non-dominant left hand on top.
Regular practice will help, but especially for the younger players, they need something more because the sticks are comparatively heavy for their size.
Here's a simple drill my granddaughter and I set up for her. Just inside the door of her bedroom, her hockey stick is leaning against the wall. On the floor is a puck. Every time she goes into her room, she grabs the stick with her top hand only (checks her grip), steps back from the puck, and taps ten times on each side of the puck. Back and forth, ten times.
It only takes seconds, but by doing this several times every day, it helps build up her hand, wrist and forearm strength, and teaches her fine control using just her top hand. After a few weeks it's already become easier for her, and she's increased it to twenty taps on each side.
Here's a (low-quality) video showing you what I mean:
Remember, this is my top hand only.
A couple of things to notice here. First, I'm tapping near the heel of the blade. You have more control of the puck closer to the heel. Secondly, when I tap on either side of the puck (or ball, either works), I'm twisting my wrist so that the blade of the stick "cradles" the puck. You can see how the blade rotates as I tap on either side. Cupping the puck like this gives you more control over it as you stickhandle, shoot, make passes or receive passes. It's another habit to get into.
If you found this useful, please leave a comment. Let me know if you do these kinds of strength drills, or if you do other kinds. I'm just a beginner, so I'm always open to learn new ways.
If you go to YouTube and do a search, you'll find tons of videos showing how people tape their hockey sticks. There is no right way, there is no wrong way, there's just the way that you prefer.
I saw a video of a pro player who gets teased by his teammates because he doesn't really tape his stick at all. He likes the textured grip that comes standard on his stick, so he just takes about an eight inch piece of tape and randomly wraps it around the handle. Mostly so he can tell his teammates that he taped his stick.
Here are two videos that I like showing one way to do it. Maybe as I become more experienced I will change how I do it, but as a beginner, this works for now.
As for the color of the tape, that's another personal preference thing. Some say that using white tape lets the goalie pick up the puck off your stick easier when you shoot, but goalies say that they're too focused on tracking the puck to notice the color of the tape.
I use white tape, because that's what I bought when I got my stick. My granddaughter uses pink, except for a single strip of white that we put near the heel of her blade as a reminder to keep the puck there while stickhandling.